Written by Malissa McClintock
In the summer of 2011, a good friend’s little man turned one. We had been co-teachers together for several years and shared a love of early childhood education, so I knew that I wanted to make something for little man that was personal, educational, and classic. I looked around the web for ideas I could modify and found a personalized puzzle. Sadly, I can’t find the original blog I read now, but here’s the puzzle I came up with.
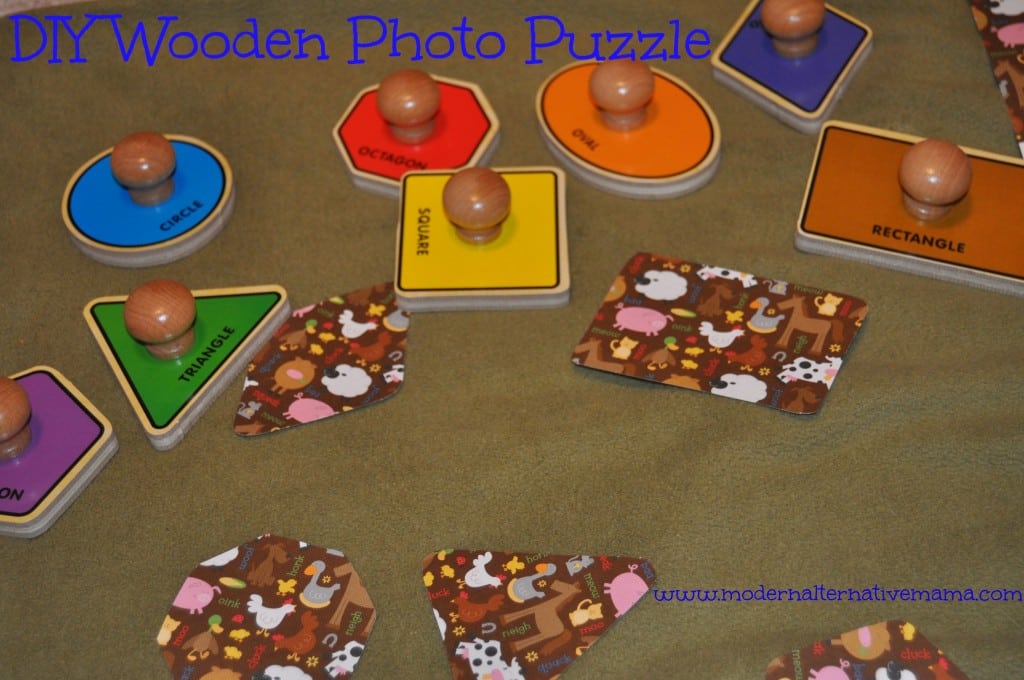
My inspiration came from Melissa and Doug’s puzzles, which I absolutely love. They are great for little hands, sturdy, wooden, and classic looking. I wanted to do shapes as the form of the puzzle to foster the learning of a one-year-old mind. I also wanted a knob handle so the handles were easily removable for smaller hands.
There weren’t any local consignment shows then, and my local consignment store didn’t have any wooden puzzles like I wanted to use. It was also a gift, so I thought a new puzzle might be better. For my kids, I would totally find a gently loved puzzle to modify or use, one we had that they’re tired of.
Wooden Photo Puzzle
Supplies & Materials Needed:
- Puzzle and puzzle pieces
- Paper to recover the puzzle shapes
- Photos for under the pieces
- Screwdriver for removing and reattaching the knobs
- Fine point pen or pencil for tracing
- Paintbrush
- Glossy Mod Podge
- Sharp scissors
Directions:
Step 1: Trace the removable shape pieces around the photos that you are using under them. Cut them with sharp scissors to get them as close to that size and shape as possible. Test them to be sure they have a good fit.
Step 2: Once satisfied, place a very thin layer of Mod Podge on the puzzle base and glue the photos.
Step 3: Allow the photos to dry for 30-45 minutes to ensure they are securely in place. To protect the photos from wear and tear during play, cover each one with two additional layers of Mod Podge- allowing each to dry for 30-45 minutes in between. You could do more layers, but I wouldn’t do any less.
Step 4: Trace the shapes onto the paper you use to recover them. I placed them all on the sheet to find the best fit before cutting. Afterward, I realized tracing and cutting on the white side of the paper would have been MUCH easier.
Step 5: Cut the shapes out with your sharp-tipped scissors. Check your completed shapes to be sure they cover the pieces well.
Step 6: Remove the wooden knobs from each puzzle piece using a screwdriver. Set the knob and screw aside and check your shape again. Once satisfied, repeat the gluing process to attach the photos to the puzzle base.
Step 7: Once all the pieces have been glued and sealed with coats of Mod Podge, reattach the knobs to them. They are all interchangeable, so this should be very simple and quick to complete.
That’s it! Your puzzle is ready for tons of play and love. I love this process because it can be applied to any similar style puzzle, and updated in any way – seasonal changes, learning words, doing math equations – the sky is the limit! Find an old puzzle and try it out. You never know where your imagination can take you!


[…] /* */ /* */ DIY Pipe lampA Lyrical QualitySeven new games from BetOnSoftDIY Wooden Photo Puzzle […]